People are currently reading this guide.
Without wasting any time, lets see How to Disable Windows Defender on Windows 10. We have provided each and every minute step with screenshots.

Step 2 : Navigate to this Registry in the registry editor. Navigate till Windows Defender registry in the Registry Editor. This is the place where we will disable windows defender settings. Now create a new registry and select DWORD 32 bit value. Name it as 'DisableAntiSpyware'.

Step 3 Now set the value data of DisableAntiSpyware to 1 and Save the window.

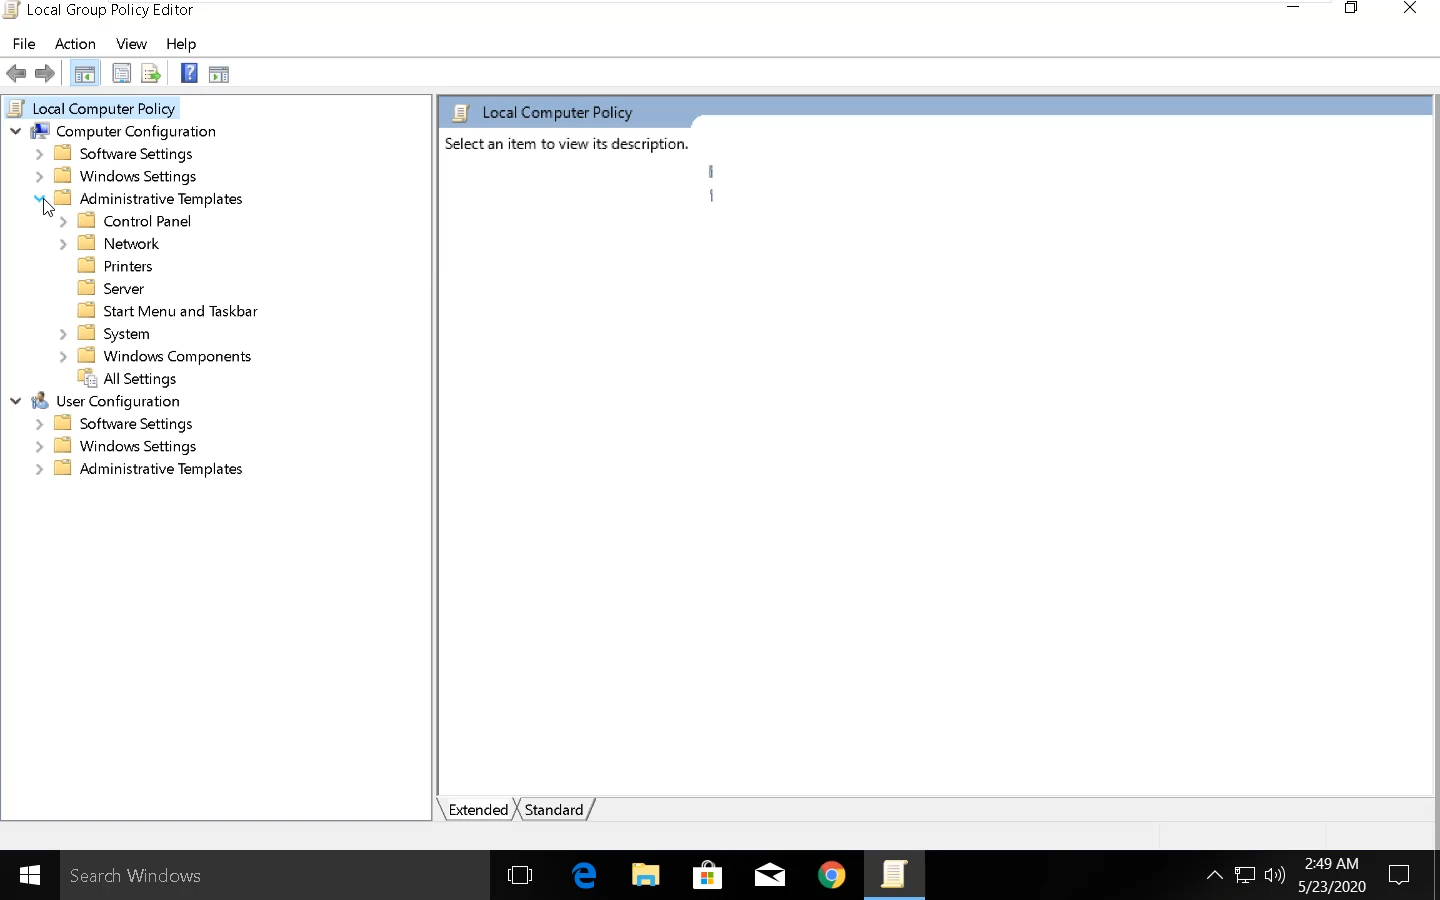
Step 4 Now open Run by pressing Win + R key together and type gpedit.msc in the text box. This will open Group Policy Editor.

Step 5 Navigate to Administrative Templates and expand it.

Now navigate to Windows Components and expand it.

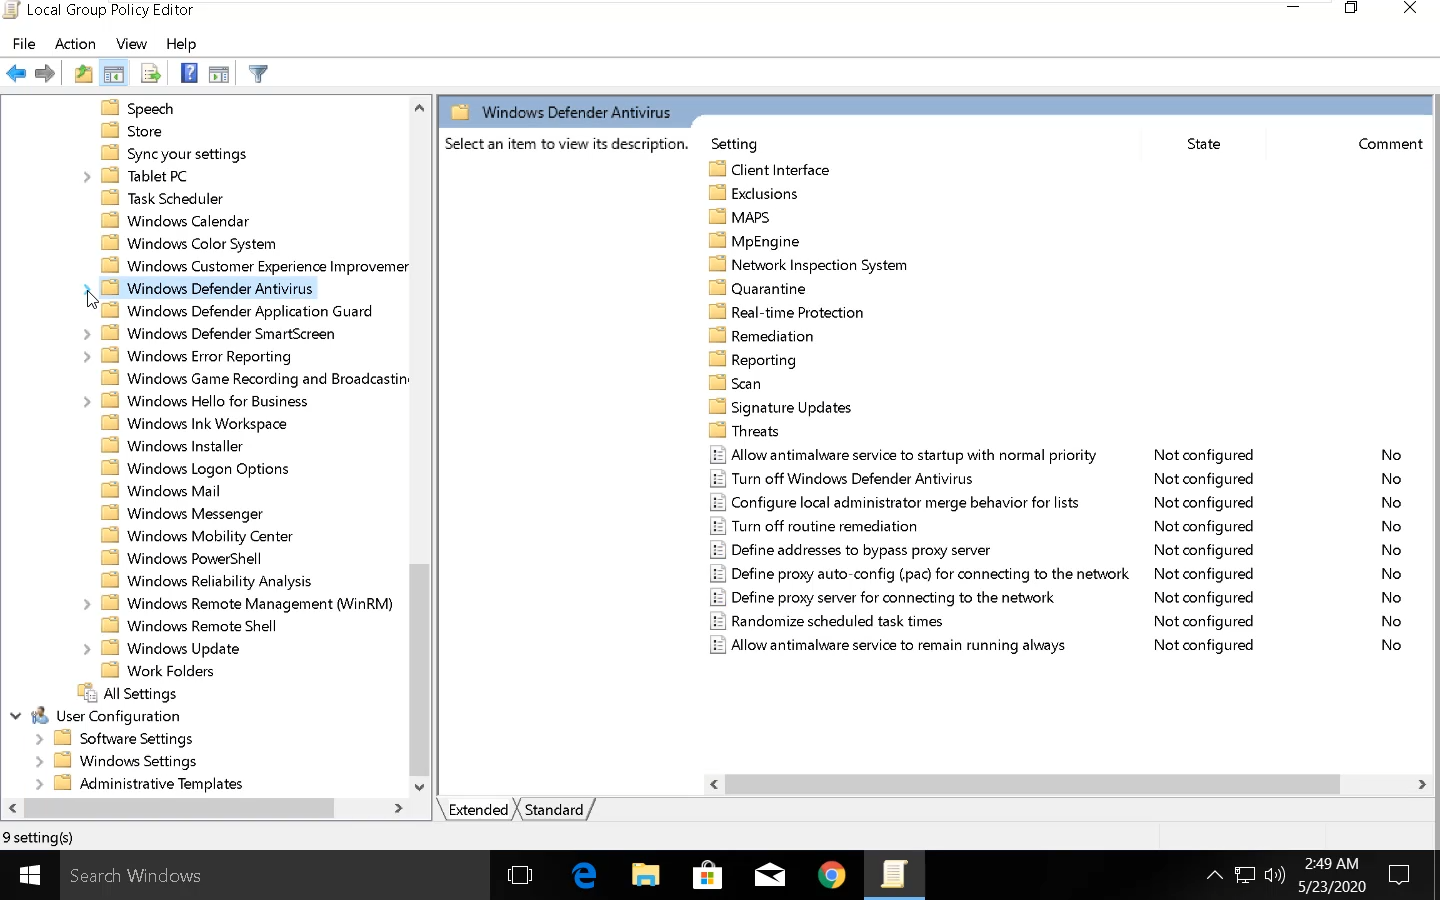
Now locate Windows Defender Antivirus key in the list. Expand the key and click on the 'Windows Defender Antivirus' key.

Step 6 Now in the right side panel. you should see an option t turn off Windows Defender Antivirus. Double Click on the option.

Step 7 The setting should be "enabled" here. This means we will enable the option to turn off the inbuilt antivirus. And apply the settings.


Now locate Real-time protection and turn the toggle button off.

Disable Windows Defender on Windows 10
Step 1 Search for REGEDIT in the start menu. Open it with Administrator rights. To do that right click on registry Editor and select Run as Admin option.
Step 2 : Navigate to this Registry in the registry editor. Navigate till Windows Defender registry in the Registry Editor. This is the place where we will disable windows defender settings. Now create a new registry and select DWORD 32 bit value. Name it as 'DisableAntiSpyware'.

Step 3 Now set the value data of DisableAntiSpyware to 1 and Save the window.

Step 4 Now open Run by pressing Win + R key together and type gpedit.msc in the text box. This will open Group Policy Editor.

Step 5 Navigate to Administrative Templates and expand it.

Now navigate to Windows Components and expand it.

Now locate Windows Defender Antivirus key in the list. Expand the key and click on the 'Windows Defender Antivirus' key.

Step 6 Now in the right side panel. you should see an option t turn off Windows Defender Antivirus. Double Click on the option.

Step 7 The setting should be "enabled" here. This means we will enable the option to turn off the inbuilt antivirus. And apply the settings.

Turn Off Real-Time Protection in Windows Defender
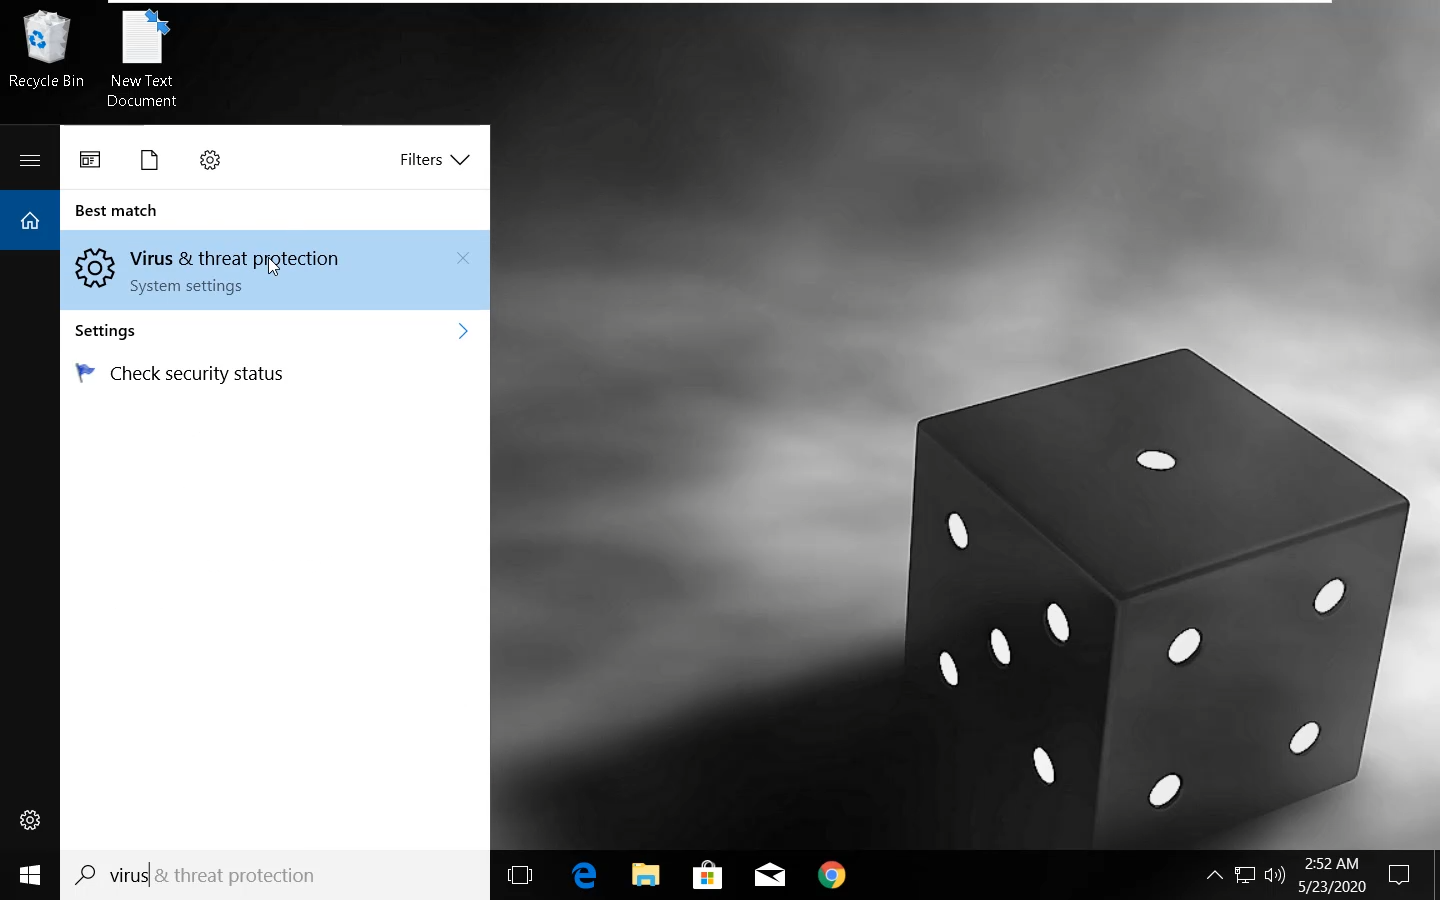
Open start menu and search for Virus and Threat Protection. Open the protection settings.
Now locate Real-time protection and turn the toggle button off.

